Developing games with Ruby and MiniGL: Part 2 - the basics
Hello, fellows. Are you ready to start developing your own games? So let’s move on!
Today we’ll explore MiniGL library’s basic features, which will allow us to create a game “prototype”.
Resource management
The MiniGL library uses the “convention over configuration” standard for loading game resources - i.e., images, fonts, sounds, etc. This means that, if you follow the conventions, you will need little to no configuration in order to load resources in a very practical way.
Let’s illustrate this with an example. Probably the most fundamental thing in a game is drawing images on the screen. MiniGL uses a convention of directories where it looks for images (as well as other resource types) for loading, so that, if you put the assets in these predefined directories, only the name of the file will be needed to load them. Furthermore, if the file has the default extension for its type, you don’t even need to inform the extension when loading. Suppose you have the following structure inside your “My First Game” project’s directory:
My First Game
|- game.rb
|- data
   |- img
      |- face.png
Let’s consider that the “game.rb” file is the same we created in the previous post. The file “face.png” is any image, like this:

Having that structure created, let’s edit the “game.rb” file to show the image.
require 'minigl'
include MiniGL

class MyGame < GameWindow
  def initialize
    super 800, 600, false
    self.caption = 'My First Game'
    @img = Res.img :face
  end

  def draw
    @img.draw 0, 0, 0
  end
end

MyGame.new.show
Only two snippets were added.
- The line
@img = Res.img :faceis creating an instance variable (indicated by the@) and assigning to it the return value ofRes.img :face.Resis the class responsible for resource management in MiniGL. The “img” method loads an image from the default folder, and takes as argument just the file name, in this case without extension, because the file has the default extension for images (PNG). The name can be passed as a string or as a symbol (a special kind of string, specific to Ruby, marked by the:). - The block started with
def drawis the declaration of a method called “draw”. This method will be automatically called each frame of the game, to define what will be drawn on the window. The line@img.draw 0, 0, 0is calling the “draw” method of the image loaded in the constructor (@imgvariable). The parameters are the coordinates x (horizontal), y (vertical) and z (“depth”, where images with higher z values are drawn “over” images with lower z values).
If you open the terminal/command prompt and run ruby game.rb (while inside the project’s directory) now, you should see the same black window from the previous post, but with the “face.png” image drawn on the top-left corner.

Notice that the call Res.img :face got to be really short thanks to the fact that we sticked to conventions. More specifically, the image is inside the default “data/img” folder (relative to the code file) and has the default “.png” extension. Similar conventions exist for the other types of resources:
- For fonts, the default directory is “data/font” and the default extension is “.ttf”.
- For sounds (sound effects), the default directory is “data/sound” and the default extension is “.wav”.
- For songs, the default directory is “data/song” and the default extension is “.ogg”.
- For tilesets (a specific kind of image, which we’ll talk about in upcoming posts), the default directory is “data/tileset” and the default extension is “.png” (like for the regular images).
Thus, to load a sound effect, for example, you would use the call Res.sound :sound1, given that there was a “sound1.wav” file inside the “data/sound” directory of your project, and so on. We will elaborate more on other types of resources in future posts.
More drawing functions and options
How about changing the background color of the window to a more comforting tone? It suffices to add a single line to the draw method:
...
  def draw
    clear 0xffabcdef
    @img.draw 0, 0, 0
  end
...
The clear method (which belongs to the GameWindow class) fills the window with a color, specified by a hexadecimal code in the format 0xAARRGGBB, where “A” is the opacity, “R” is the red component of the color, “G” is the green component, and “B” is the blue one (if you’ve already worked with CSS or even some image editors, you may know this notation). The “A” component will be ignored in this case, because it is the window background, but it will be useful later for changing the opacity of images.
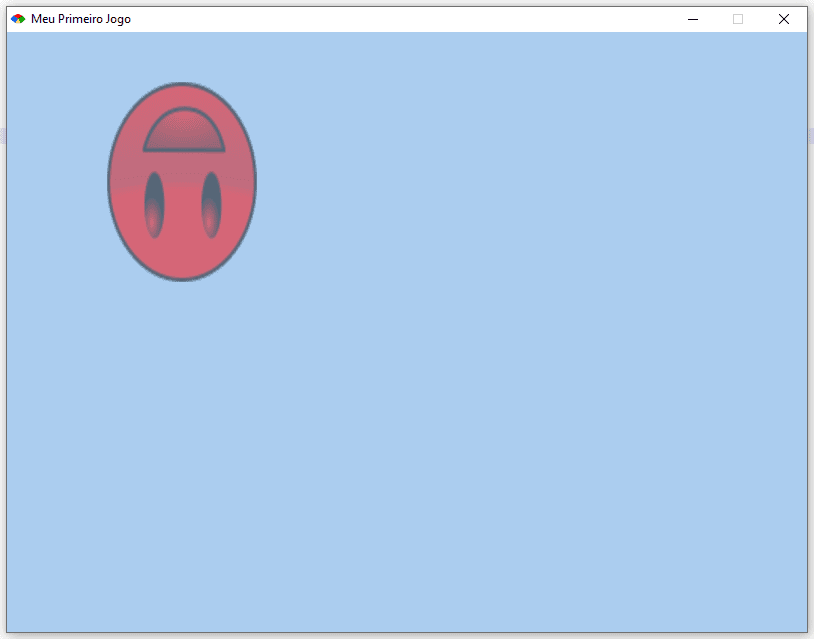
Run the game again now, and you will see that the window’s background will be filled with a light blue.
It is also possible to customize in various ways how the image is drawn. First, of course, it is possible to change its position on the screen by changing the values of the first two parameters of the call to “draw”. This method, however, accepts some more arguments (optional), which are (from the fourth):
scale_x: horizontal scale of the image - the default value is 1, that is, the image will be drawn with its original horizontal size. A value of 2 indicates that the image should be drawn with double its horizontal size. It is also possible to pass in non-integer values, like 1.5. Negative scales will cause the image to be flipped.scale_y: vertical scale - same concept as the parameter above, but for vertical size.color: color to apply as “filter” to the image, specified in the same format as in theclearmethod of the window. The default filter is white and 100% opaque (0xffffffff), which draws the image with all its original colors. If you specify a value less thanfffor the first two digits (“A” component), the image will be drawn semitransparent. If you provide different values for the “R”, “G” or “B” components, these values will be multiplied by the original value of each pixel, changing the image’s colors. For example, if you provide the value “0x80ff0000” for this filter, the image will be drawn around 50% opaque and with all of its colors shifted to red (because the “R” component is left untouched and the “G” and “B” are zeroed).
Let’s try these options with our image! Change the line @img.draw 0, 0, 0 to:
@img.draw 100, 250, 0, 1.5, -2, 0x80ff0000
and see what happens:
Finally, it is possible to rotate the image! For that, though, we use another drawing method, draw_rot, which accepts mostly the same parameters as draw, but also some additional ones to specify the rotation. More specifically, after the third one (“z”), it accepts the following:
angle: the rotation angle, in degrees, clockwise, where 0 corresponds to 12 hours in the clock.center_x: the horizontal position of the rotation center relative to the center of the image. The default value is 0.5, i.e., the horizontal coordinate of the rotation center will be in the middle point. A value of 0 indicates the left edge and 1 indicates the right edge.center_y: same ascenter_x, but for the vertical position.
After these, the method also accepts the scale_x, scale_y and color parameters, in the same order. Let’s experiment:
@img.draw_rot 100, 250, 0, 45, 0.5, 0.5, 1.5, -2, 0x80ff0000
The result:

Please note that, now, the x and y coordinates (two first arguments) indicate the center of the image (no longer the top-left corner).
Receiving commands from the user
Ok, now we know how to draw images, but a game can’t be called a game if a player can’t interact with it, right? So let’s see how to respond to user’s actions through the keyboard and mouse. It’s fairly simple!
First, we declare two variables (@x and @y) that will define the position of the image on the screen, so that the user’s actions can change it:
...
  def initialize
    ...
    @x = @y = 0
  end
...
Next, we declare a new method in the game window class, called “update”. Just like the “draw” method is called automatically every frame to draw things, the “update” method is called every frame, before “draw”, to run any logic not related to drawing. It’s in this method that we must put all the user interaction logic. Let’s write it like this:
...
  def update
    Mouse.update
    KB.update

    if Mouse.button_down? :left
      @x = Mouse.x
      @y = Mouse.y
    end

    @x += 1 if KB.key_down?(Gosu::KB_RIGHT)
    @x -= 1 if KB.key_down?(Gosu::KB_LEFT)
    @y += 1 if KB.key_down?(Gosu::KB_DOWN)
    @y -= 1 if KB.key_down?(Gosu::KB_UP)
  end
...
The calls to Mouse.update and KB.update are necessary in order for the game to listen to the mouse and keyboard events. Remember to call these right in the beginning of the “update” method, so that any logic that follows can make use of the methods that check for mouse and keyboard events (of course, if your game won’t use one of these, you can omit the corresponding call).
The Mouse class provides the button_down?, button_pressed? and button_released? methods to detect when a mouse button is pressed, when it was pressed in the current frame and when it was released in the current frame, respectively. In the code above, we’re checking if the left button (identified by the :left parameter) is pressed and, if that is the case, we set the @x and @y coordinates to the x and y positions of the mouse cursor (Mouse.x and Mouse.y).
The KB class, on the other hand, provides the key_down?, key_pressed? and key_released? to check for the same kinds of events mentioned above, but for keys of the keyboard. Each key is identified by a constant defined in the main namespace of Gosu (the library that serves as foundation for MiniGL), like Gosu::KB_RIGHT and Gosu::KB_LEFT. For a complete listing of the constants, visit this page. So, in the code above we’re incrementing or decrementing the @x and @y coordinates as the corresponding directional keys are pressed.
As the idea is that the user clicks on the screen to set the image’s position, we will have to make the cursor visible (it is hidden by default). For that, we need to define the “needs_cursor?” method, returning true:
...
  def needs_cursor?
    true
  end
...
To make the interaction work, all that’s left is to adjust the “draw” method so that the image is drawn in the position defined by @x and @y (also, we’ll revert the other drawing parameters to their default):
...
  def draw
    clear 0xffabcdef
    @img.draw @x, @y, 0
  end
...
Run the game now and you’ll be able to control the face’s position with the mouse and the keyboard arrows! Fun, right? Not that much, I know… But that’s only the beginning. ;)
The final code for today’s post is:
require 'minigl'
include MiniGL

class MyGame < GameWindow
  def initialize
    super 800, 600, false
    self.caption = 'My First Game'
    @img = Res.img :face
    @x = @y = 0
  end

  def update
    Mouse.update
    KB.update

    if Mouse.button_down? :left
      @x = Mouse.x
      @y = Mouse.y
    end

    @x += 1 if KB.key_down?(Gosu::KB_RIGHT)
    @x -= 1 if KB.key_down?(Gosu::KB_LEFT)
    @y += 1 if KB.key_down?(Gosu::KB_DOWN)
    @y -= 1 if KB.key_down?(Gosu::KB_UP)
  end

  def needs_cursor?
    true
  end

  def draw
    clear 0xffabcdef
    @img.draw @x, @y, 0
  end
end

MyGame.new.show
Thanks for coming this far and see you in the next post!